Crunchy Raspberry Chocolate Chunks

Crunchy Raspberry Chocolate Chunks

Raspberry and chocolate are two flavors that go very well together. They’re one of my favorite combinations. These raspberry chocolate chunks are very easy to make, even on a moment’s notice.

The key ingredient is freeze dried raspberries. I find these at Target or on Amazon. Using freeze dried raspberries means you don’t have to worry about spoilage. Melting chocolate, perhaps, but not spoiled raspberries.

freeze dried raspberries


Freeze dried raspberries have a wonderful taste. The freeze drying process brings out the flavor perfectly.

The first thing to do is break up the raspberries. The whole ones are a bit too much raspberry in one spot, in my opinion.

Pour the freeze dried raspberries into a ziploc bag. Seal it. Then take a smooth kitchen mallet and start tapping on them.

smash raspberries

Don’t go too wild on this. You don’t want a powder. You want small pieces and no whole raspberries. There will be some powder, and that’s fine. Keep it to a minimum.

Melt your chocolate in 30 second increments in the microwave or use a double boiler. Stir regularly. I use a semi-sweet chocolate for these because not all of my kids like their chocolate dark. They go well with just about any kind of chocolate.

Once the chocolate is completely melted, stir in the broken up raspberries. Mix well.

chocolate raspberries

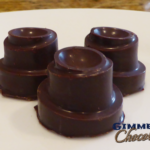
You can put these into molds if you want a nice shape, or spoon into chunks. You may want a little more chocolate in the mix if you’re using detailed molds, as the raspberries won’t flow well into small details of the molds.

Refrigerate until solid.

Crunchy Raspberry Chocolate Chunks

3.23 from 1306 votes
Crunchy Raspberry Chocolate Chunks
Ingredients
  • 10 oz semi-sweet chocolate
  • 2/3 cup freeze dried raspberries
Instructions
  1. Pour freeze dried raspberries into ziplock bag. Seal.

  2. Tap lightly with smooth kitchen mallet until whole raspberries are broken up. Do not pound into a powder.

  3. Melt chocolate in microwave in 30 second increments, stirring between segments, until smooth. Alternatively, melt chocolate in double boiler, stirring until smooth.

  4. Combine raspberries and chocolate. Mix thoroughly.

  5. Place parchment paper on baking sheet. Spoon small batches onto paper to make chunks.

  6. Alternatively, spoon mix into candy molds. Tap mold to fill details. You may need slightly more chocolate in the mix to fill the mold details well. If you want a smooth back, do not fill completely with raspberry chocolate mix. Use melted chocolate to top off the mold.

  7. Refrigerate until solid.

Easy Chocolate Fruit and Nut Clusters

easy chocolate fruit and nut clusters

I always like to joke about chocolate being a food group. It comes from the cacao bean, so it must be a vegetable, right? Ok, maybe not. Maybe it would be better to make some fruit and nut clusters to get a healthier treat.

These chocolate fruit and nut clusters are very easy to make, and as chocolate treats go, are on the healthy side. Nuts in moderation are pretty good for you. Unless you’re allergic, in which case, don’t try this one.

This gives you your sweet and salty fix in one go, along with a great crunch. If you’re trying to eat less chocolate, this will give you a bit of chocolate for that urge, but a larger portion of nuts.

These are super easy to make because you just choose a trail mix. I suggest that the trail mix not have really large nuts such as Brazil nuts to make them easier to eat. The trail mix also doesn’t need to have chocolate chips or M&Ms in it. Just nuts and dried fruit such as raisins or cranberries. I prefer dried cranberries for this recipe. The flavor goes better with chocolate.

add trail mix

You could also go with a single type of nut, such as peanuts or almonds. I prefer the variation you get with trail mix. You could also make your own mix by selecting your favorite nuts and dried fruits.

The mix I used includes dried cranberries, golden raisins, cashews, pepitas, sunflower seeds and almonds.

Adding in some coconut oil will make the chocolate a little thinner. This is good if you want a thin coat on the trail mix. Using coconut oil will mean that the finished chocolates should stay in the fridge. If it’s warm in your house, you’ll probably want to keep the chocolates in there anyhow.

I didn’t measure anything out for this recipe. It’s fairly easy to eyeball how much trail mix goes into the melted chocolate. If you put in too much trail mix, you just melt more chocolate and add it in.

mix chocolate and trail mixOnce it’s all mixed up, spoon up small clusters. How big depends on the look you’re going for. I go for small. They’re super quick snacks that way. You can use miniature cupcake wrappers to hold larger clusters, which is a great look for gifts or when you’re sharing with company. You don’t want people handling multiple pieces of chocolate when you’re sharing with a group.


3.2 from 40 votes
easy chocolate fruit and nut clusters
Easy Chocolate Fruit and Nut Clusters
Ingredients
  • 10 oz 60% cacao chocolate
  • 1-2 tsp coconut oil optional
  • 2 cups trail mix
Instructions
  1. Chop chocolate into small pieces. Melt in microwave in microwave safe bowl in 30 second increments until thoroughly melted, or melt in double boiler. If using coconut oil, melt with the chocolate. Total melt time should be about 2 minutes in the microwave, but may vary.

  2. Mix in trail mix. Stir until trail mix is thoroughly coated.

  3. Cover baking sheet with parchment paper. Spoon small portions of mix into piles on baking sheet. Refrigerate or freeze until solid.

Chocolate Popping Frogs

chocolate popping frogs

Fans of Harry Potter will remember the chocolate frogs, a popular treat that sometimes moved a little fast. They made a big impression on a lot of kids, so mine were delighted when I decided to have a go at making some at home. These chocolate popping frogs are a huge hit with my kids and their friends.

Obviously, there’s no way to really make them hop, unless you really are a wizard. But you can add Pop Rocks to chocolate, which gets the idea across and is a lot of fun.

We had to experiment a little to figure out which kind of chocolate worked best. In general, a darker chocolate seems to work better than milk chocolate. The Pop Rocks fizzed quite a bit more when being mixed into milk chocolate, which meant less popping when the kids ate the frogs.

You will also want to consider the age of the kids eating these treats. Some may not be up for a darker chocolate, and the milk chocolate will have to do.

And of course, you need frog molds. Amazon has a great selection of candy molds, and what it came down to for us was a combination of a frog shape we liked without it being too large. Yes, the movie ones are pretty big, but that’s not ideal for snacking.

These frogs are great if you want to have a Harry Potter themed party, a Halloween party, or anytime you think you can get away with putting chocolate popping frogs out on the table.

Pop Rocks can be a little hard to find at times, but I have a trick for this treat. When Halloween comes around, the dollar store by me gets bags of off brand popping candies. Pop Rocks by any other name do quite well in this recipe. They’re sold in a pouch with a bunch of tiny pouches to hand out to trick or treaters. Before Halloween, they’re a little cheaper than buying the same amount of Pop Rocks. After Halloween, they go on sale for $0.25 a pack, and that’s when I get my supply for the year.

It’s a bit of extra work opening all the packets, but I don’t worry about mixing the flavors. You don’t really notice the flavor of the Pop Rocks once they’re in the chocolate anyhow.

The first thing you do is melt your chocolate. I use a microwave safe bowl and melt the chocolate in 30 second increments in the microwave, stirring each time.

pop rocks in chocolateOnce the chocolate is melted, pour in the Pop Rocks. It takes quite a bit to get a good level of popping into the chocolate.

Stir them up and spoon into the frog molds. Tap the molds on the counter to get rid of as many bubbles as possible.

Refrigerate until firm, then pop out of the mold. You can keep them in the fridge if the weather is warm, just so they don’t melt too fast when guests grab them. If you want to get fancy you can print up a box for them, but I’ve never had anyone really care about the box. It’s chocolate! And Pop Rocks! In frog shapes! They usually don’t care beyond that.

Chocolate Popping Frogs

10 oz 60% cacao chocolate, chopped (or preferred chocolate)
1-2 oz popping candy

Melt chocolate in microwave in 30 second increments, stirring between rounds. When chocolate is smooth, add popping candy to taste, stirring until well mixed. Some popping of the candy is normal.

Spoon mix into frog molds. Tap on counter to remove bubbles and get a smooth finish on top.

Refrigerate until firm, about one hour, then remove from molds and prepare for the fun.

pop rocks frogs

Disclosure: Some of the links in this post are 'affiliate links.' This means if you click on the link and purchase the item, I will receive an affiliate commission.

Homemade Pomegranate Truffles Recipe

homemade pomegranate truffles

These chocolate pomegranate truffles are simply amazing. You really can taste the pomegranate juice. Dark chocolate adds to the flavor, and overall these pomegranate truffles have a very rich flavor that is hard to beat.

I make these for most family holidays, but especially Thanksgiving and Christmas. They’re very popular with older children, teens and adults, but younger children may find the flavor too strong. I’ve had people get distinctly cranky with me for forgetting to bring these to a family gathering. I wasn’t disappointed… more for me, although I was embarrassed to have left these at home.

They’re easy to make, but can require a bit of patience. Sometimes the truffle comes out a little too soft to work with easily, even after cooling in the refrigerator for hours. Even then, the taste is amazing. You can melt some extra chocolate if necessary and add it to the melted mix. Stir well, and you should have a thicker truffle to work with when it solidifies. Don’t overdo the chocolate, or you may hide the pomegranate flavor.

You start by gently simmering down the pomegranate juice. I use the lowest heat possible, and it takes about an hour to simmer a cup and a half to a bit below 3/4 cups.

pomegranate juice

Sometimes I’m lucky enough to find small bottles of Pom pomegranate juice at the dollar store, and then I simmer down several at once so it’s ready for next time. I portion it back into bottles and freeze until I need them. The frozen batches just need to be defrosted and then heated to a simmer so the chocolate will melt in it.

Remove pomegranate juice from heat. Add the chocolate chips and stir until it’s all melted and mixed.

pomegranate chocolate

Most times I use chocolate molds so that I don’t have to worry about the pomegranate chocolate filling being firm enough to roll. Molds are much easier to use. Fill a mold with melted chocolate (I use 60% cacao, just like in the filling), and tap the mold on the counter to fill in the nooks. You may not get all of them filled, but it helps.

Wait a short time, then pour the excess chocolate back into the bowl. Then add the pomegranate chocolate, and put into the refrigerator to cool for at least 30 minutes.

fill molds with chocolate and pomegranate

Once the filling is fairly solid, you can put more chocolate on top to finish filling the mold. Tap the mold on the counter again to smooth out the backs. The mold is cold at this point, and you have to work quickly, as the chocolate solidifies fast. Refrigerate 30-60 minutes to completely firm up the truffle, and pop each one out of the mold.

Pack them up into a container for your own use, or make them pretty to give away. This recipe makes a lot – I get about 70-75 chocolates out of it with the molds I use. Your results will vary, depending on the size of the mold you use, or if you decide to make rolled pomegranate truffles instead.

Don’t be surprised if the kids or anyone else in the house volunteers to clean the pan out after you’ve made all the pomegranate truffles. My kids get quite messy enjoying those last bits of truffle that don’t make it into a mold.

pomegranate truffles

3.64 from 50 votes
pomegranate truffle
Pomegranate Truffles
Ingredients
  • 1-1/2 cup pomegranate juice
  • 12 ounces dark chocolate chips or finely chopped chocolate (I like 60% cacao, semisweet is acceptable)
Coatings (optional, choose one)
  • 12 ounces 60% cacao chocolate (chopped works better than chips for molding or dipping)
  • 1/4 cup freeze dried raspberries powdered
Instructions
  1. Heat the pomegranate juice in a small saucepan. Simmer until it has reduced by at least half. I like it a little less than half so that the truffle is easier to work with, as the chocolate is a bit firmer with less liquid. Use the lowest heat possible, so that you don’t burn the pomegranate juice. Remove from heat.

  2. Add the chocolate and to the pomegranate reduction in the saucepan, and stir until the chocolate is smooth.

  3. Now it’s decision time. Are you rolling the truffles or putting them into a molded chocolate shell? Dipping in chocolate or rolling in a coating such as cocoa? Powdered freeze dried raspberries make an excellent coating. Have fun here.

  4. If you’re rolling these into truffle balls, you will need to refrigerate the mix for at least three hours for it to be firm enough to hold shape. You may also need to keep them in the refrigerator or freezer when they aren’t out for people to eat. They can be a little soft and melty at room temperature.

  5. If dipping in chocolate, make the truffle balls, and then freeze them for an hour or so. This will minimize the melting caused by warm dipping chocolate.

  6. If using molds, see the instructions given above the recipe.

Disclosure: Gimme Chocolate is a participant in the Amazon Services LLC Associates Program, an affiliate advertising program designed to provide a means for sites to earn advertising fees by advertising and linking to amazon.com. I also review or mention products for which I may receive compensation from other sources. All opinions are my own.

Subscribe to my feed Twitter Pinterest Instagram