Heavenly Chocolate Drizzled Strawberry Pie

Heavenly Chocolate Drizzled Strawberry Pie

I love it when strawberries come into season. They’re such a delightful treat, and so easy to work with. While they are wonderful on their own, they’re absolutely heavenly in this chocolate drizzled strawberry pie.

The one problem with strawberries is how fast they go bad. You have to be ready to use them as soon as you buy them.

There are a couple ways to make strawberry pies. A lot of the recipes I see use gelatin to glaze the strawberries. I chose not to do that. This glaze for the strawberries is made from strawberries. It’s not as smooth as a gelatin glaze, but I like it better.

The one place where I got lazy was with the pie crust. I have a pie crust recipe I adore, and I’ll get around to sharing it one of these days, but it takes time to make a good crust. Sometimes I want to make a pie quickly. Store bought crust makes pies easier to make. My kids rarely eat the crust anyhow. I found these pie crusts on a really good deal, so I bought a few.

You have to bake your pie crust first for this recipe. Whether you’re using a store bought crust or making one of your own, start out with that. Follow the directions for prebaked pie crusts for your recipe.

Allow the crust to cool. Melt about 2 oz chocolate chips in the microwave, then paint the inside of the pie crust with the chocolate. The chocolate adds flavor and keep the crust from getting soggy if the glaze doesn’t firm up fast enough. If everything goes right, it won’t be a problem anyhow, but sometimes glazes are stubborn. Refrigerate the crust while making the rest of the strawberry pie.

chocolate coated pie crust

Strawberries are a little tricky in recipes. How much strawberry is in a quart or a cup of them depends on how big they are. Sometimes they’ll be extra juicy or sweet.

Some of the quantities on the ingredients for this pie are flexible. If your strawberries are super sweet, for example, you won’t need as much sugar in the glaze as you might if they’re on the tart side. Lemon juice can be added if you like things a little more tart. You might also decide you want a few more strawberries in the pie than the recipe calls for. They’re strawberries. Have fun with them.

Wash your strawberries thoroughly. I like using a vinegar wash to kill any spores on the berries. My hope is that the pie will stay good longer this way, although it generally doesn’t last long enough for this to really matter. The vinegar wash takes 1 cup of vinegar to 8 cups of water. Stir them gently around in the vinegar wash and let them sit in there for a little. Drain and rinse. Allow the strawberries to dry before putting them in the pie.

You can slice the strawberries or not. Some people like to leave them whole. I quartered mine because they’re easier to eat that way. Whole is prettier, especially if you arrange them nicely in the crust. Hull your strawberries and slice if desired.

sliced strawberries

Put about three quarters of the strawberries in the crust, saving about a quarter of them for the glaze. I checked how full the crust would be of strawberries before putting any into the glaze. If you don’t have enough fresh strawberries for the glaze, defrosted frozen strawberries are adequate for the glaze. Ideally, keep it all fresh.

strawberries in pie crust

Puree the strawberries that are going into the glaze. This is much easier than mashing them, and will keep the glaze more consistent.
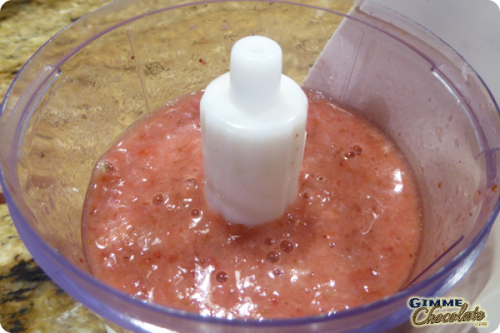
pureed strawberries

Pour the pureed strawberries into a saucepan and add sugar. Add lemon juice if you want a little added tartness. Bring to a boil over medium heat.

Combine cornstarch and water, and stir into strawberry and sugar mixture. Reduce heat to low and simmer until the glaze thickens, about 5-10 minutes. The longer you simmer it, the thicker the glaze will be. You can add a little red food coloring if you want a more intense color to the glaze.

making strawberry glaze

Pour the glaze over the strawberries in the pie crust. Make sure to coat all of the strawberries.

glazed strawberries in pie crust

Melt 1-2 oz chocolate chips in the microwave. Use a spoon to drizzle the chocolate over the pie.

drizzle chocolate strawberry pie

Allow pie to cool in refrigerator until the glaze has set. This usually takes a few hours, but may depend on how much you thickened your glaze.

One thing I have to warn you – strawberry pies are very difficult to serve neatly. The strawberries like to spill everywhere. They still taste wonderful.

Heavenly Chocolate Drizzled Strawberry Pie

4.35 from 391 votes
Heavenly Chocolate Drizzled Strawberry Pie
Ingredients
  • 1 cooked pie crust
  • 3-4 oz chocolate chips, separated
  • 1-2 qt fresh strawberries
  • 3/4 cup sugar
  • 1 tsp lemon juice optional
  • 3 tbsp corn starch
  • 1/2 cup water
Instructions
  1. Melt about 2 oz chocolate chips in microwave. Spread on the inside of the pie crust and up the sides. Refrigerate to solidify the chocolate.

  2. Add about 3/4 of the strawberries to the pie crust. Slice in halves, quarters, or leave whole as desired. Fill pie crust to desired level with strawberries.

  3. Puree remaining strawberries.

  4. Add pureed strawberries and sugar to a saucepan and bring to a boil over medium heat. Stir frequently.

  5. Add cornstarch to water, mix, then add slowly to strawberry and sugar mixture. Reduce heat to low and simmer until glaze has thickened, about 5-10 minutes. Add a few drops of red food coloring if the glaze is too pale for your personal tastes.

  6. Pour glaze over strawberries in pie crust, taking care to coat all of them.

  7. Melt remaining chocolate chips in microwave. Use a spoon to drizzle the melted chocolate over the strawberry pie. Refrigerate until glaze sets, which may take a few hours.

Easy Indulgent Dark Chocolate Lime Truffles

Easy Indulgent Dark Chocolate Lime Truffles

Truffles are one of my favorite treats to make. They’re easier to make than most people think, so everyone is in awe when you bring some over. They don’t have to know that the truffles weren’t that hard to make. Recently, I made dark chocolate lime truffles.

Many lime truffle recipes will specify key lime, because people expect that in lime recipes. I did not use key limes. I could have, but those things are tiny! It’s much easier to use a larger lime. I picked some up at a local store for this recipe.

I generally prefer molded chocolates to rolling truffles. It’s just so much easier, in my opinion. Plus you get that lovely gloss with very little effort. You also don’t have to wait for the filling to solidify. In fact, it’s better if you don’t. It’s much easier to fill a mold with a runny filling than one that is solid.

It all starts with a lime.

lime

Roll the lime back and forth on the counter, putting a little pressure on it. This loosens up the insides so that you get more juice from it. I wash it after, then zest the lime. I suggest using a microplane or the very fine shred holes on a box grater to get the zest. You do not want the white pith, just the green part of the peel.

Once I have enough zest, I cut the lime in half and juice it.

Remember, these are not tiny little key limes. If you’re using key limes, you will need more of them. A single key lime will not give you enough zest or juice. They do have a stronger flavor, and can be worth the effort, but that wasn’t the mood I was in.

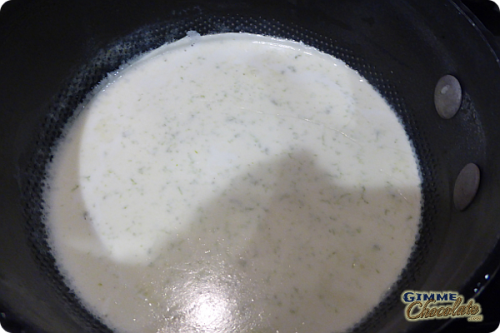
Stir the lime zest into a half cup of cream in a small saucepan. Put it over medium heat until the edges start to bubble. Put a lid on the saucepan and remove from heat. Allow to steep for 20 minutes.

lime cream

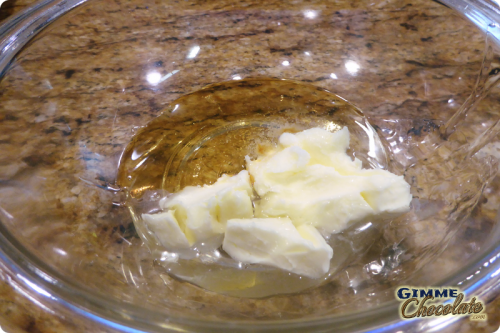
While you wait for the cream to steep, soften white chocolate and butter together with just a little salt. They don’t need to be fully melted yet. 45 seconds in the microwave and a good stir should be enough at this point.

After the cream has finished steeping, reheat it to a simmer, with an occasional stir. Decide if you want to remove the zest or not. I don’t. I like a more tart flavor when I do lime, and my zest is fine enough that the truffles are still smooth. If your zest is a little bit, you may want to remove it by straining the cream through a fine strainer.

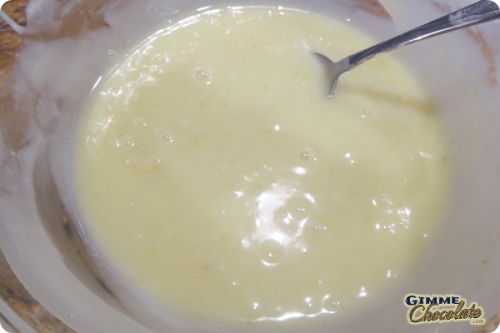
Whisk the cream and chocolate together until the chocolate is smooth. If you’re going to roll truffles, this mixture will need to be refrigerated for about 4 hours to solidify enough for rolling. I don’t do that, so we can head over to molding right away.

lime chocolate

Melt 12 oz of dark chocolate, at least 60% cacao, but more if you like darker. I use the microwave in 30 second increments, stirring between rounds. Do not overheat the chocolate, or the coatings won’t turn out right. When the chocolate is close to fully melted, you should be able to stir it a little extra and complete the melting process without heating it more.

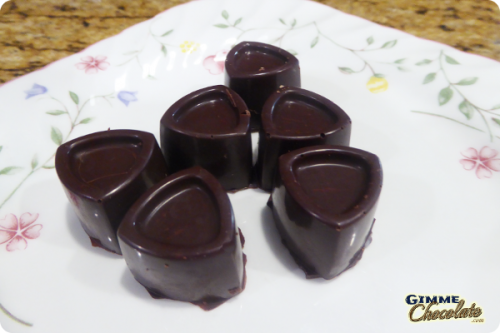
I used my triangle molds for this one. It’s a very simple design, and it’s easy to remove the finished chocolates from the mold.

That’s a part of what I love about silicone molds. You can just push the chocolates out once they’re firm. It takes a little more work to get chocolate out of plastic molds. When it comes down to it, however, I choose my molds by the shape and size rather than the material they’re made of.

Spoon the melted dark chocolate into the molds. Tap the molds on the counter to work the bubbles out, then pour the excess chocolate back in with the rest. If you want a thicker layer of chocolate, let it sit for a minute or two first. I like thin coatings for most of mine. This keeps the focus on the flavor of the filling.

This is another point where silicone is nice. It’s flexible, so I can bend the molds and take better aim at the bowl as I pour the excess chocolate out. I gently shake the molds as I do this. Scrape the excess chocolate off the tops of the molds to help things along.

Spoon the lime truffle filling into the molds. You want this as close as possible to the top while leaving room for some chocolate at the top. Refrigerate for about 20-30 minutes to partially solidify the filling.

lime truffle filling

Top off with chocolate. Tap the molds on the counter to smooth off the tops, then fill in any gaps. Scrape off the excess chocolate, and refrigerate again for about a half hour.

When the chocolates are fully solidified you can remove them from the molds. Check one first to make sure that it comes out smoothly. If it gives you trouble, the truffles are not solid enough and need more time in the refrigerator.

I keep these dark chocolate lime truffles in an airtight container in the refrigerator when they aren’t out for people to eat. They shouldn’t last long after that. I found that the flavor developed a little over the first day or two. They were a bit sweet at first, but the lime flavor really came through after they sat for a while.

My absolute favorite truffles are still my pomegranate truffles, but these are very good too.

lime truffles

Easy Indulgent Dark Chocolate Lime Truffles
Ingredients
  • 1/2 cup heavy cream
  • 1 regular lime, juiced and zested
  • 10 oz white chocolate
  • 1/4 cup butter, chopped into pieces
  • dash salt
  • 12 oz dark chocolate
Instructions
  1. Combine lime zest and heavy cream in a small saucepan. Heat over medium heat until cream just starts to simmer. Cover and remove from heat. Allow to steep for 20 minutes.

  2. While cream and lime zest steep, combine white chocolate and butter. Melt in microwave for 45 seconds to get things started. Stir and add salt.

  3. Return cream and zest to medium heat and back to a slight simmer. If you want to remove the zest, pour the cream through a fine strainer onto the white chocolate. If you want the added flavor of the zest, pour the cream directly onto the white chocolate.

  4. Stir until white chocolate is fully melted and the mixture is smooth.

  5. If you want to roll truffles, refrigerate for at least 4 hours before you roll them. Refrigerate or freeze after molding, then melt dark chocolate in microwave in 30 second increments, stirring between rounds, until fully melted but not too hot. Quickly dip truffles in dark chocolate.

  6. If making molded truffles, do not refrigerate truffle filling. Melt dark chocolate in microwave in 30 second increments, stirring between rounds, until fully melted. Fill molds with dark chocolate. Tap molds on counter to get the air out, then pour chocolate out of the molds.

  7. Carefully spoon truffle filling into molds. Keep the level just a little below the top. Refrigerate for 20-30 minutes to start solidifying the filling. Top with more dark chocolate after the filling is sufficiently solid. Tap the molds on the counter to smooth things out, and scrape off excess chocolate if possible.

  8. Refrigerate truffles until the chocolate has fully solidified. They should come out of the molds fairly easily. If they break or leave pieces behind, they need more time in the fridge.

How To Make Chocolate Covered Strawberries – Quick And Easy!

How To Make Chocolate Covered Strawberries - Quick And Easy!

Chocolate covered strawberries are a classic treat. The two go so well together. But when you see chocolate covered strawberries in the stores, they’re expensive. Fortunately, they’re super quick and easy to make on your own.

Wash The Strawberries

The first thing you need to do is wash your strawberries. I suggest using one cup of vinegar to eight cups of water to wash them. Let the strawberries sit in the vinegar and water for a few minutes, and stir them around a bit. Rinse and drain, then allow the strawberries to dry completely.

cleaning strawberries

This should help keep your strawberries from spoiling too quickly. With chocolate on them, they may not sit around long at all, but why give them the chance? The vinegar should kill any spores on the fruit so that it lasts longer. This also works on blueberries and blackberries.

Make sure your strawberries are completely dry before you try to dip them in chocolate. It only takes a tiny bit of water to mess up your dipping chocolate. Check around the leaves to ensure that everything is dry.

I recommend using room temperature strawberries for dipping. Cold ones will make your chocolate solidify too quickly, both on the strawberries and in the dipping container.

You can remove the tops of the strawberries if you don’t want to deal with the leaves while dipping. If you do that, I suggest putting the strawberry on a skewer so that you can easily cover the entire strawberry. I usually leave the tops of the strawberries on.

Prepare The Chocolate And Toppings

Think about any decorations you want to put on your strawberries. I used some sprinkles I had on hand this time – not a lot as I didn’t want to interfere too much with the strawberry and chocolate flavor combination.

You can decorate your chocolate covered strawberries with sprinkles, drizzle with more chocolate, cover them in nuts or crushed Oreos, or whatever suits your mood.

If you’re dipping the strawberries into something after the chocolate, prepare a bowl of it.

Melt your chocolate with some coconut oil. You can use whichever kind of chocolate suits your needs. White chocolate works well for some uses, as does milk chocolate, but I prefer to use dark chocolate for the flavor.

Cover a baking sheet with parchment paper so that the strawberries have a place to dry after being dipped.

Hold each strawberry carefully by the leaves to dip them. This also allows you to dip the strawberries deeper into the chocolate without coating the leaves. Sometimes the leaves will pull off easily. When that happens, I toss the leaves. A skewer can be helpful for dipping these – just make sure you do something about the hole the skewer leaves. You can cover it with a bit more chocolate, but these ones may need to be eaten a bit faster than the strawberries that remained whole.

dipping strawberries

Dip each strawberry as far as you can into the chocolate without dipping the leaves. A spoon is helpful for pouring more chocolate onto the strawberry as the chocolate level gets too low to cover the strawberry by dipping alone.

Add the sprinkles or other toppings while the chocolate is still melted. I just dropped sprinkles onto these strawberries. If you want to roll your chocolate dipped strawberries in another topping, it may help to give it just a couple of minutes to dry so that the chocolate is still melted but not too runny. Runny chocolate will fall off the strawberries if you roll the strawberry in the toppings too quickly.

dipped strawberries

Do not allow the chocolate coating of the strawberries to touch as they dry on the parchment paper. You’ll have to break them apart if they do touch. Usually that leaves one strawberry with missing chocolate, and we can’t have that, now can we?

Once all of the strawberries have been dipped and decorated, place the baking sheet in the refrigerator. Let the chocolate solidify for at least a half hour to an hour before serving. Keep the chocolate covered strawberries in the refrigerator except when serving so they don’t go bad too quickly.

If you have leftover dipping chocolate, find a use for it. I dumped fresh blueberries into mine and stirred them around. That gave me a quick version of chocolate covered blueberries. Not as neatly done as the strawberries, as the blueberries were refrigerated and made the chocolate solidify too quickly as I stirred, but delicious nonetheless. The clumps of chocolate covered blueberries would not be an attractive presentation for guests, however. I’d have to do them more carefully for that.

Chocolate Covered Strawberries

If you love chocolate covered fruit, take a look at my Chocolate Covered Pineapple With Strawberries recipe. I serve that one frozen, which makes the pineapple taste amazing!

3.48 from 790 votes
Chocolate Covered Strawberries
Ingredients
  • 1 lb fresh strawberries
  • 12 oz chocolate - chips or chopped
  • 2 tsp coconut oil
  • sprinkles or other toppings optional
Instructions
  1. Make sure your strawberries are clean and dry. Cover a baking sheet with parchment paper.

  2. Melt chocolate and coconut oil in the microwave in 30 second increments, stirring between rounds. Continue until chocolate is smooth.

  3. Dip each strawberry into the chocolate while holding the leaves out of the chocolate. 

  4. If sprinkles or other toppings are desired, add them after dipping in the chocolate.

  5. Place dipped strawberries on the parchment paper to dry. Keep them separate so the chocolate doesn't stick them together. Refrigerate at least 30-60 minutes before serving. Keep refrigerated.

How To Make Homemade Creme Eggs

How To Make Homemade Creme Eggs

How much do you love Cadbury Creme Eggs? They’re super popular around here. We get a few before Easter, but the rest get bought on Half Price Candy Day. Well, more like 30% off at some stores, but you do what you have to do.

But rather than wait for Cadbury Creme Eggs to come out each year, how about making your own version? Homemade creme eggs are pretty easy to make. They aren’t exactly like the Cadbury version, but they’re pretty good.

These are easiest done in candy molds, although you can hand shape and dip them if that’s the way you roll. I like using molds for the pretty designs.

Because I made these for Easter, I made these in egg shaped candy molds. They aren’t totally 3D, but that’s because I didn’t want to deal with trying to put the two sides together. I certainly could have filled two sides and used a little chocolate to make it more egg-shaped all the way around if I wanted.

Keeping the halves apart has another advantage – portion control! They’re a nice size for eating without getting too large this way.

Easter is such a hazardous time if you’re trying to behave about candy. These creme eggs and my chocolate dipped Peeps aren’t the only things I’ve made for the holiday, just the only ones I’ve posted about in the past few days. I also made my pomegranate truffles and crunchy raspberry chocolate chunks. We usually skip the chocolate bunnies you can get from the store because there’s so much homemade stuff.

Combine light corn syrup, room temperature butter, salt, and vanilla using your mixer. This part is super easy. Beat until smooth.

butter and corn syrup

Adding the powdered sugar takes some extra effort. You don’t want a cloud of powdered sugar going everywhere. Add it a bit at a time, and start the mixing by hand. You can use the mixer more as the powdered sugar gets mixed in, but that stuff gets everywhere if you aren’t careful. And sometimes even if you are.

creme egg filling start

My oldest daughter was shocked by how much powdered sugar this recipe takes. The look on her face was pretty classic. Kids don’t always realize how much this stuff shrinks into the rest of the ingredients.

By the time all of the powdered sugar is in there, the mix is getting stiff. My poor little handheld mixer really struggled with it at the end. You may want to do all of this mixing by hand. This may have to do with my house being pretty cold the day I made these. Room temperature for the butter was maybe a little on the cool side still.

Take about a third of the mix and add yellow food coloring if you’re sticking to the egg look. It only takes 2-3 drops.

Homemade creme egg filling

If your mix is a little runny, you can refrigerate the mix before trying to form it. This isn’t necessary if you’re using mold – the more flexible the mix is, the easier it is to put into molds.

Melt your chocolate (I chose semi-sweet this time, but milk chocolate is closer to the originals). Milk chocolate may need a little coconut oil so that it flows better into the molds. I didn’t use that for my semi-sweet chocolate, however.

Fill the molds and let the chocolate sit for 1-2 minutes. This will give a thicker shell than pouring it out right away. After pouring out the chocolate, refrigerate the molds for a few minutes to partially harden the chocolate.

Homemade Creme Eggs Chocolate Shells

If the filling is stiff enough, you can fill the eggs and put the chocolate over the backs right away. I found it a little difficult to get the yellow parts to stay kind of round, as half eggs don’t have a lot of depth. Try to get the filling in as neatly as possible, so that there aren’t too many holes. This is easier if the filling isn’t totally solid. Keep the filling just below the top of the mold so that there is room for the chocolate.

Filled homemade creme eggs

Drop the molds short distances to the countertop after putting the chocolate on the backs to smooth the chocolate out. This gives a nice, fairly smooth look.

Refrigerate for about a half hour to set the chocolate. If the chocolate is firm enough, it should come out of the molds easily. If it’s not ready, refrigerate for longer.

I had a slight problem with some of the excess chocolate on the backs of the eggs. I broke it off, and accidentally exposed some of the insides of the egg. If that happens, there are two things you can do.

1. Eat the egg.
2. Dab a little chocolate over the exposed filling and chill the egg for a little while.

I mostly did the second option, but there’s always the sacrificial/sample candy option in there. You’re doing all this work; you get to have a little fun too. Now that you know how to make homemade creme eggs, you don’t have to wait for the stores to get them.

How To Make Homemade Creme Eggs

3.33 from 1680 votes
How To Make Homemade Creme Eggs
Homemade Creme Eggs
Ingredients
  • 1/2 cup light corn syrup
  • 1/4 cup butter room temperature
  • 1/4 tsp salt
  • 1-2 tsp vanilla extract
  • 3 cups powdered sugar
  • 3 drops yellow food coloring optional
  • 12 oz milk chocolate
  • 1 tsp coconut oil
Instructions
  1. Combine light corn syrup, room temperature butter, salt, and vanilla using your mixer. Beat until smooth.

  2. Add powdered sugar slowly, maybe a half cup at a time. Mix by hand to avoid a mess. As the powdered sugar combines with the other ingredients, you can start using your mixer again. Mix until smooth.

  3. Optional: Take about a third of the mixture and place into another bowl. Mix in yellow food coloring until desired color is achieved.

  4. Melt chocolate and coconut oil in 30 second increments in microwave. Stir between rounds. Chocolate will become smooth after a few rounds.

  5. Spoon chocolate into candy molds. Tap to get the bubbles out. Allow to sit for 1-2 minutes to make a slightly thicker shell. Pour out excess chocolate.

  6. Refrigerate molds for a few minutes to slightly firm up the chocolates.

  7. Add in filling. Start with the white part, then put a ball of yellow "yolk" in the middle. Cover with more white.

  8. Refrigerate if necessary to firm up the filling. If filling is already firm or after refrigeration, cover the backs of the molds with chocolate. Refrigerate for at least 30 minutes to solidify the chocolate in the mold.

  9. Remove chocolates from molds when they come out of the molds easily. If the chocolate sticks too much, place back in the refrigerator and cool longer. You may want to place these back in the refrigerator after removing from molds to ensure that chocolate solidifies completely.

  10. Serve when you can't keep the ravening hordes away any longer.

Quick And Easy Chocolate Dipped Peeps

Chocolate Dipped Peeps

Peeps. You love them or you hate them. My kids love them, especially microwaved. They also go wild for the chocolate dipped Peeps. While the ones in the store are on the pricey side for what you get, they’re easy to make at home.

My local dollar store carries Peeps for Easter, and the price is generally better than what I can get them for at Target or Walmart. That’s always nice.

You don’t want to make these too much in advance. Slightly stale Peeps are still pretty good if you already like Peeps, but completely stale and crunchy Peeps… not so much.

I prefer to just dip the bottoms of the Peeps. I’m sure it’s easy enough to chocolate coat the whole thing, but I think it’s enough to just dip the bottoms. This way there’s also less fuss about getting every nook and cranny covered. You also get to keep the pretty colors this way.

Melt your chocolate in the microwave with some coconut oil. Use 30 second increments and stir between rounds.

peeps in a row

Separate the individual Peeps from their rows. Dip each one in chocolate. You may want to get a little extra on the sides to cover where the marshmallows were torn apart.

peeps in chocolate

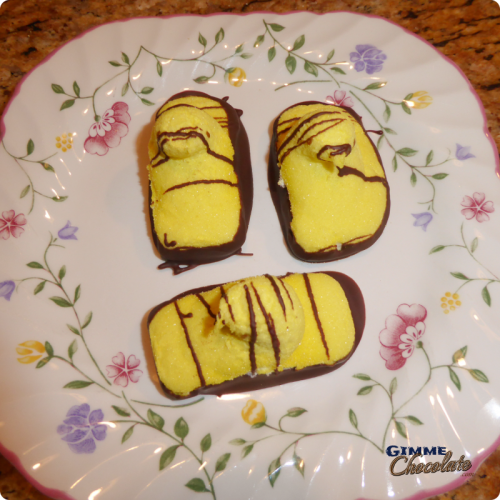
Place the chocolate dipped Peeps on parchment paper on a baking sheet. Keep a little space between so the chocolate doesn’t make them stick together as it solidifies. If you have excess chocolate, you can drizzle some across the tops just for fun. It’s not pretty, but it’s more chocolate. More chocolate is good.

chocolate drizzled peeps

Refrigerate for about an hour to solidify.

To keep the Peeps from going completely stale too fast, I keep them in a Ziploc bag. It’s not the prettiest storage solution, but it helps. They don’t usually last long enough to become excessively stale anyhow.

Chocolate Dipped Peeps

Chocolate Dipped Peeps
Ingredients
  • 8 oz chocolate chips
  • 1 tsp coconut oil
  • 1 package marshmallow Peeps
Instructions
  1. Melt chocolate chips and coconut oil together in microwave, using 30 second increments. Stir between rounds until chocolate is smooth.

  2. Cover a baking sheet with parchment paper. Separate the Peeps and dip each one into the chocolate. Try to cover the marshmallows to where they were separated.

  3. Place the chocolate dipped Peeps onto the parchment paper with a little space between so the chocolate doesn't have to be broken apart later.

  4. If you have excess chocolate, drizzle a little over the Peeps, just for fun.

  5. Refrigerate for one hour or until chocolate is solid. Store in a Ziploc bag or airtight container so the Peeps don't get too stale... if they last that long.

Chocolate Banana Ice Cream

Chocolate Banana Ice Cream

It’s time for another super easy banana ice cream. This time, it’s chocolate banana ice cream. Simple, delicious and healthy. It’s a combination we all adore.

I’ve shared my recipes for chocolate mint banana ice cream and for chocolate chip raspberry banana ice cream before. This one is much easier, as you probably have all the ingredients on hand.

If you don’t have any frozen banana slices, make some first. Slice a ripe banana, spread out the slices on the cutting board, and freeze for at least an hour. Waiting for them to freeze is the longest part of the recipe.

If you have previously frozen banana slices, and they’ve been in the freezer for more than a day, take them out of the freezer and defrost for 5-10 minutes. They’ll blend better this way. You don’t need to defrost banana slices that haven’t been in the freezer that long. They’ll be fine.

Put about a banana and a half’s worth of slices per person in your food processor. Don’t try to make a huge batch – you can’t refreeze this ice cream. It will solidify too hard if you do. Banana ice cream is something you make because you want it right now, not later.

Add about a tablespoon of ground chocolate or chocolate drink mix. The better the quality, the better the banana ice cream will turn out. I like to use Ghirardelli’s ground chocolate. I keep the big container on hand because it makes good hot chocolate too. You could probably make this work with Ovaltine or Quik, but I haven’t tested them. Their chocolate flavors aren’t strong enough for me.

chocolate and banana in food processor

Use the food processor on the pulse setting. Running it too long will be too hard on the motor. Besides, the bits of banana will climb out of the reach of the blades, and you have to knock them down sometimes. Keep this up until the chocolate banana ice cream is smooth.

Serve immediately. You can add toppings if you want, or drop a bit of fruit in at the very end so that you get chunks of fruit in your ice cream.

I have just one kid who doesn’t love this. It’s strange. She loves bananas. She loves frozen bananas. And she loves chocolate. But she doesn’t like chocolate banana ice cream. I don’t get it. But since the rest of my kids adore this, I’ll keep making it. The one who doesn’t like it can snack on the frozen banana slices.

Chocolate Banana Ice Cream

Chocolate Banana Ice Cream
Ingredients
  • 1-1/2 frozen bananas, sliced
  • 1 tbsp ground chocolate
Instructions
  1. If your bananas have not already been frozen and sliced, slice them, put the slices on a cutting board, and freeze for at least one hour.

  2. If your bananas have been frozen for more than a day, take them out of the freezer and defrost for 5-10 minutes before proceeding.

  3. Place frozen banana slices in food processor, approximately one and a half banana's worth per person. Do not make more than you plan to serve immediately.

  4. Add one tablespoon of ground chocolate per person.

  5. Use the pulse setting of the food processor to blend the bananas. Knock down the bits that climb out of the range of the blades. Continue pulsing food processor until chocolate banana ice cream is smooth.

  6. Optional: Add choice of fruit chunks and give a quick pulse of the food processor to add to ice cream.

  7. Serve immediately. Leftovers do not freeze well.

Dark And White Chocolate Drizzled Caramel Popcorn

Dark And White Chocolate Drizzled Caramel Popcorn

Caramel popcorn is a great treat, but when you want to take it to the next level, you add chocolate. This takes it from a fun treat to something wonderfully decadent. This dark and white chocolate drizzled caramel popcorn takes some time to make, but your family will love it.

The part that takes the longest is making the caramel popcorn. It’s not really all that difficult, but it is time consuming. If you want an easy cleanup, you may want to get one or two of those disposable aluminum roasting pans. The high edges will help when you need to stir the popcorn. Any roasting pan will do the job if you have one.

Start by making the popcorn. I used my Stir Crazy popcorn popper. It took two rounds to make as much as I wanted. Put the popcorn into your roasting pan as you make it so that you can see when you have enough. This way it’s ready to go when your caramel is hot. Do not line it with aluminum foil… the caramel will stick too much to it and make stirring very difficult. It’s not worth the trouble.

Once the popcorn is made, start on the caramel and preheat your oven to 250 degrees F.

Melt one cup of butter in a saucepan. Add two cups of brown sugar, half a cup of corn syrup, and a teaspoon of salt. Bring this whole thing to a boil. Stir constantly so that it mixes well as it comes to a boil.

caramel ingredients

Once all of this is boiling, stop stirring and allow to boil for 4 minutes. Remove from heat and stir in baking soda and vanilla extract.

Pour the hot caramel all over the popcorn. Quickly stir the popcorn and caramel together. The caramel will not perfectly coat the popcorn at this time – that’s a part of what happens while you cook this in the oven.

caramel popcorn

Place the caramel popcorn in the oven and bake for one hour, removing from the oven every 15 minutes to give it a good stir. This will help coat the popcorn more thoroughly.

Allow the popcorn to cool. Break apart the chunks once it has cooled.

Now you get to add the chocolate! Spread the popcorn out in a single layer. You can spread it on a baking sheet lined with parchment paper at this point, and cleanup will be easier. I kept some of my popcorn as plain caramel corn, which made it easier to spread out. Besides, caramel popcorn without chocolate is yummy too!

Melt a half cup of white chocolate with a teaspoon of coconut oil in 30 second increments in your microwave, stirring between rounds until smooth. Drizzle the white chocolate back and forth across the popcorn.

white chocolate caramel popcorn

Do the same with the dark chocolate. I used a spoon to make it easier to drizzle the chocolate.

dark chocolate caramel popcorn

The chocolate will harden if leave it out, but if you want to speed things up, pop the baking sheet into the refrigerator for a half hour or so. It’s not a good place to store popcorn, though. Not that your family is likely to give you a chance to store the popcorn once they see it.

Dark And White Chocolate Drizzled Caramel Popcorn

4.85 from 137 votes
Dark And White Chocolate Drizzled Caramel Popcorn
Ingredients
  • 3/4 cup popcorn kernels
  • 1 cup butter
  • 2 cups brown sugar
  • 1/2 cup corn syrup
  • 1 tsp salt
  • 1/2 tsp baking soda
  • 1 tsp vanilla extract
  • 1/2 cup white chocolate
  • 1/2 cup dark chocolate
  • 2 tsp coconut oil, divided
Instructions
  1. Pop the popcorn. This may take more than one round, depending on how you make it. Place popped popcorn in a roasting pan and put aside. You may need two pans to make stirring easier.

  2. Preheat oven to 250 degrees F.

  3. Make the caramel. Melt butter in a saucepan over medium heat, then add brown sugar, corn syrup, and salt. Stir constantly until this mixture comes to a boil.

  4. Allow mixture to boil for 4 minutes without stirring.

  5. Remove from heat and add in baking soda and vanilla extract. Stir well, then pour over the popcorn. Stir the popcorn well to start coating. Coating will not be complete at this stage.

  6. Place popcorn in oven and bake for one hour. Remove from oven every 15 minutes and give the popcorn a good stir. This will help coat the popcorn more evenly.

  7. Remove from oven and allow popcorn to cool. Break up the large chunks of caramel popcorn when it is cool.

  8. Spread the caramel popcorn out in a single layer on a baking sheet covered in parchment paper.

  9. Melt the white chocolate with 1 tsp of coconut oil in a bowl. Use the microwave in 30 second increments, stirring between rounds. Drizzle melted white chocolate across the caramel popcorn using a spoon.

  10. Melt the dark chocolate with 1 tsp of coconut oil in a bowl. Use the microwave in 30 second increments, stirring between rounds. Drizzle melted dark chocolate across the caramel popcorn using a spoon.

  11. Allow chocolate to solidify. You can speed this up with about 30 minutes in the refrigerator, but do not store the popcorn in the fridge. Move into a serving bowl or storage container when the chocolate is solid.

Strawberry Lemonade Bark

Strawberry Lemonade Bark

I’ve been spending some time thinking about what treats to make for my family for Valentine’s Day. My kids are a little spoiled when it comes to decent quality chocolate – they can’t stand the cheap stuff sold in heart boxes by most companies this time of year. I can’t say I blame them – most of that is pretty awful.

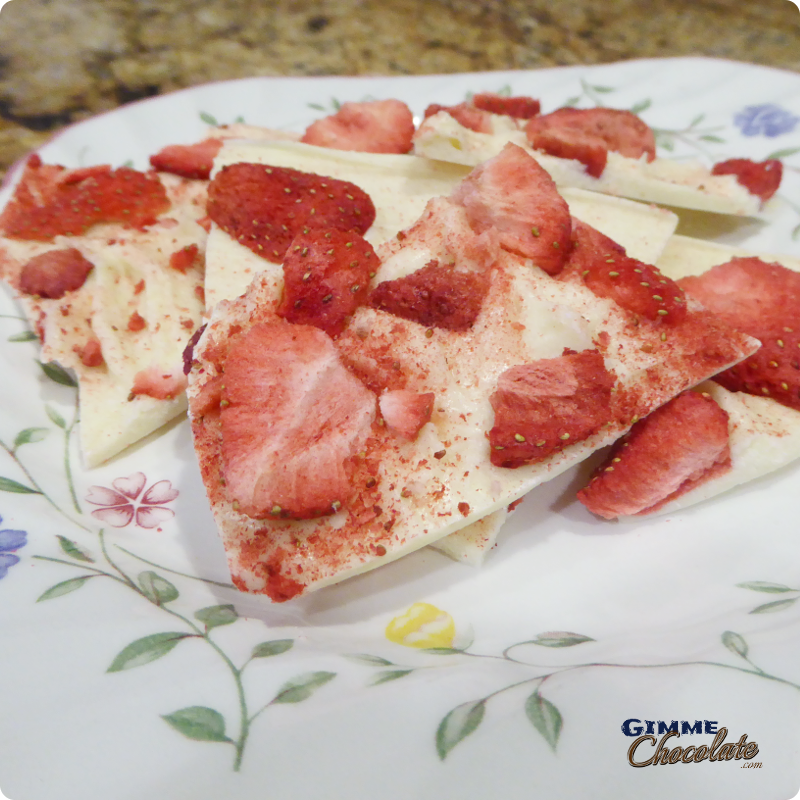
This year I decided to start out with some strawberry lemonade bark. I like the color combination that white chocolate and freeze dried strawberries bring for a Valentine treat. Like any other chocolate bark, it’s also very easy to make. I used white chocolate chips because they work well enough for this kind of treat.

Strawberry Lemonade Bark supplies

I chose a combination of lemon extract and citric acid for the lemonade flavoring in the white chocolate. The lemon extract gives the flavor a good start, and the citric acid brings a nice tartness to the chocolate.

Amounts don’t have to be precise. Taste the white chocolate as you add in the lemon extract and citric acid so that you get the right tartness for your preferences. I like thinks pretty tart, but my youngest daughter hates anything sour so I have to be careful.

Mix the lemon extract and citric acid into the melted white chocolate thoroughly. The citric acid takes some work to mix in smoothly, but it’s worth it.

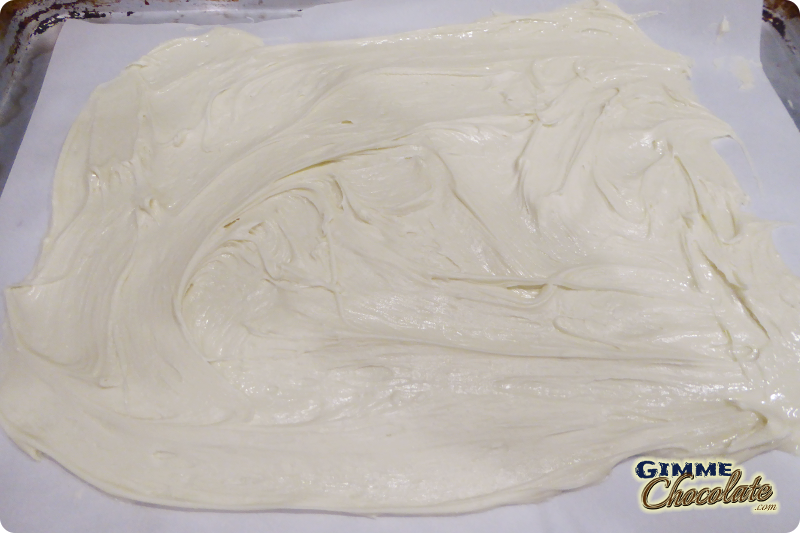
Once the white chocolate is sufficiently lemony for your tastes, spread it in a thin layer on a parchment paper covered baking sheet. This doesn’t have to be perfectly smooth – chocolate bark looks good with a little roughness. Make sure no sections are too thick.

spread lemon chocolate

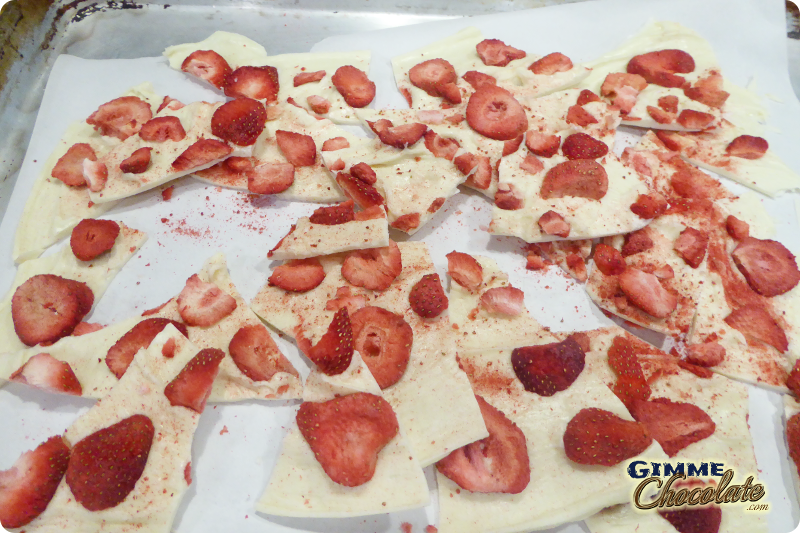
Sprinkle the freeze dried strawberries all over the white chocolate. The large pieces can be moved around so they aren’t too thick in any one area. Tap them lightly into the chocolate so that they stay in place.

strawberries on lemon chocolate

There will be strawberry powder in the bottom of the bag. I did what I could to sprinkle the powder over as much of the chocolate as possible. It gives a nice color and flavor to those areas not covered by larger pieces.

Refrigerate for one hour, then break into serving size chunks.

Strawberry Lemonade Bark broken

You could also do this in molds, but I like the rough look of broken bark. Amazon carries a nice selection of heart shaped silicone molds for chocolate.Strawberry Lemonade Bark

Strawberry Lemonade Bark
Ingredients
  • 11 oz white chocolate chips
  • 1 tbsp lemon extract
  • 1/2 tsp citric acid or to taste
  • 0.52 oz bag freeze dried strawberries
Instructions
  1. Prepare a baking sheet by covering it with parchment paper.

  2. Melt white chocolate chips in microwave using 30 second increments and stirring between rounds. Chocolate should become smooth.

  3. Mix lemon extract into melted white chocolate and stir thoroughly to combine. Add citric acid to taste.

  4. Spread white chocolate in a thin layer over the baking sheet.

  5. Sprinkle freeze dried strawberries over the white chocolate, moving large pieces as needed for a good distribution. Use strawberry dust in package as well. Tap large strawberry pieces lightly into chocolate.

  6. Refrigerate for one hour to solidify chocolate. Break into chunks and serve.

Chocolate Covered Marshmallow Pretzels

Chocolate Covered Marshmallow Pretzels

Ever have one of those days where you just look at an ingredient in your pantry and wonder what to do with it? That happened to me the other day. I bought some marshmallow fluff on a whim a few weeks ago, and nothing had happened with it yet. It was time. I looked around the pantry for a little, and settled on chocolate covered marshmallow pretzels.

As with any chocolate dipped treat, these are pretty easy to make. The most important thing to do is make sure that you freeze the pretzels well after dipping them in the marshmallow fluff. The whole thing goes a lot better if the fluff is frozen solid.

The other thing to remember is that it is very easy to break pretzel rods. Marshmallow fluff is stiff enough to do that if you aren’t careful during the dipping process.

I chose pretzel rods because they’re easy to hold after dipping. If you want to do this with pretzels in the traditional knot, I’d suggest spooning the fluff onto them and coating the whole thing.

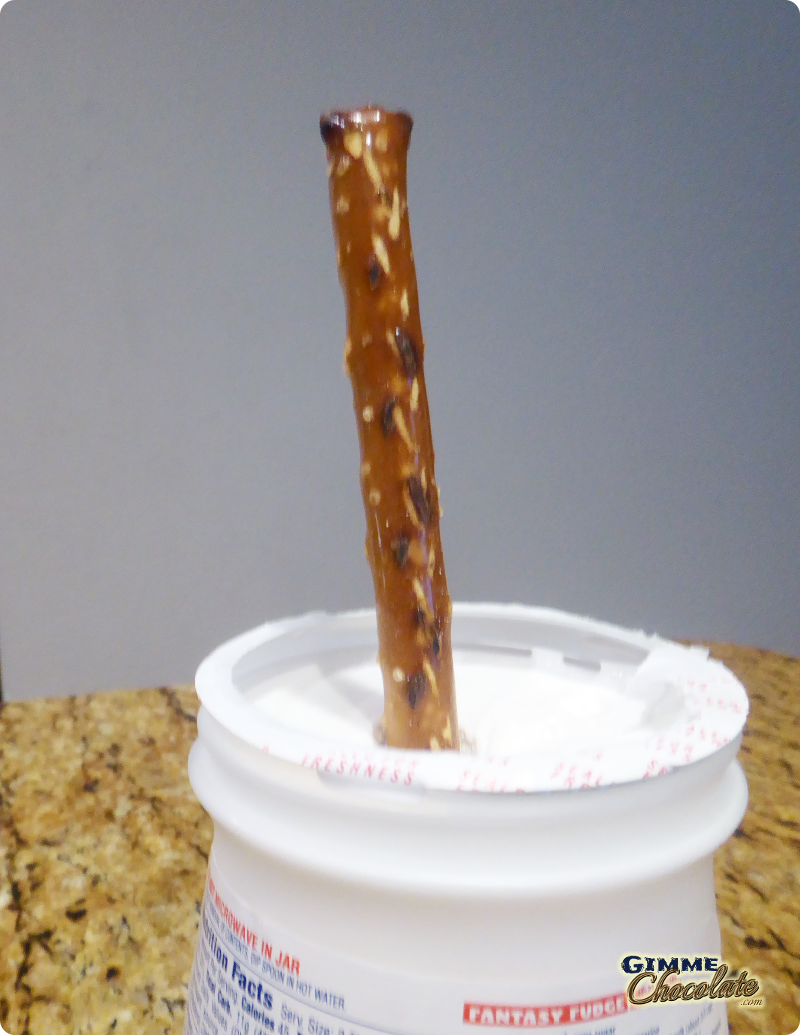
The first few pretzel rods were simple to dip. Poke them into the fluff, pull them back out, and they’re nicely coated. Allow a generous portion of marshmallow fluff to remain on the pretzel, or the other flavors will overwhelm the marshmallow.

marshmallow fluff with pretzel

After those first few, however, the fluff needs a good stir, and you’ll probably need to use a spoon to get the fluff onto enough of the pretzel rod.

Place each fluff dipped pretzel rod onto a baking sheet covered in parchment paper. Work quickly, as the marshmallow fluff will slowly puddle to the sides of the pretzels. Freeze as soon as possible for at least an hour.

fluff dipped pretzels

Prepare a second baking sheet by covering it with parchment paper. You can’t reuse the one that the pretzel rods covered in marshmallow fluff are on in the freezer right now – the fluff will sometimes remain behind as you pick up the rods to dip in chocolate. It’s much neater to use a second baking sheet instead.

Melt your chocolate in the microwave in 30 second increments with some coconut oil to help it run more smoothly. Stir between rounds until the chocolate is smooth.

Check on the frozen pretzel rods. If the marshmallow fluff pulls smoothly off the parchment paper, they’re ready for dipping. If it sticks, they need more time.

Working quickly, dip each pretzel rod in the chocolate and place on the second baking sheet. Cover the marshmallow fluff section completely. Add sprinkles if desired. If the marshmallow fluff starts sticking, they need to go back into the freezer for at least 10-15 minutes before you continue dipping. Place all the rods into the refrigerator or freezer once you’re done dipping them to solidify the chocolate.

Chocolate Covered Marshmallow Pretzels

Eating these chocolate covered marshmallow pretzels frozen is the most fun. The marshmallow fluff is nicely chewy when frozen. They taste great at room temperature too. Marshmallow fluff will try to escape out of any gaps in the chocolate if you keep these at room temperature.

Chocolate Covered Marshmallow Pretzels

Chocolate Covered Marshmallow Pretzels
Ingredients
  • 10 pretzel rods
  • 1 container marshmallow fluff
  • 8 oz chocolate chips
  • 2 tsp coconut oil
Instructions
  1. Prepare two baking sheets by covering them with parchment paper. You will need one for the first part of this recipe, and the second later on.

  2. Dip each pretzel rod in the marshmallow fluff. The fluff will need to be stirred regularly with a spoon, and you may need to use a spoon to spread the fluff further onto the pretzel rods. Place each one on the first baking sheet, making sure the fluff covered portions do not touch.

  3. Freeze them for at least one hour, or until the marshmallow fluff pulls cleanly off the parchment paper when the pretzel is picked up.

  4. Melt the chocolate chips and coconut oil together in the microwave in 30 second increments, giving a quick stir between rounds, until smooth.

  5. Working quickly, dip the frozen fluff covered pretzel rods in the chocolate. Cover the marshmallow fluff completely. Add sprinkles if desired. If the fluff starts to stick to the parchment paper, put them back into the freezer for 10-15 minutes, then continue dipping.

  6. Refrigerate or freeze the chocolate covered marshmallow pretzels to solidify the chocolate. These can be served frozen or at room temperature.

Chocolate Covered Popcorn With Nerds

Chocolate Covered Popcorn With Nerds

Popcorn can be a nice, healthy treat. Well, healthy until you coat it with chocolate and add in a bunch of Nerds candy. Then, maybe not so healthy. But healthy isn’t the point of making chocolate covered popcorn with Nerds. Fun is.

This was made as a fun surprise for my kids. They had no idea that I had made it until I pulled it out of the cabinet. That’s one of the fun parts of having kids in school – they’re easy to surprise because they aren’t always home with you. They already know I like Nerds with chocolate ever since I made the Chocolate Covered Marshmallow Monsters, which also had Nerds as a topping.

I used dark chocolate for this recipe because it’s my favorite. If you want to go for looks, try it with white chocolate. The Nerds should show up better that way too.

I made a bunch of popcorn with my Stir Crazy popcorn popper. That leaves a little oil on the popcorn, but really not enough to notice. I wouldn’t recommend using store bought microwave popcorn for this recipe as I’m not at all sure what the butter flavoring would do to the taste.

If you really want to microwave your popcorn, you can prepare plain popcorn for the microwave. Pour about a quarter cup of popcorn kernels into a lunch size paper bag. Fold the end over a time or two and place in the microwave. Cook about as long as you would store bought microwave popcorn – maybe two minutes. You’ll know it’s done when the popping slows down enough.

Don’t burn popcorn in the microwave. My daughter has a friend who prefers it that way and did it once at my house. We had to open all the windows on a cool day because it smelled so awful. She was happy, though. I tried some, and it tasted as bad as it smelled.

When you have enough popcorn made, it’s time to prepare the chocolate. Place the popcorn in a large bowl, bigger than it looks like the popcorn needs. You’ll be doing a lot of stirring.

Melt the chocolate in the microwave in 30 second increments, stirring between rounds, until it’s completely melted. Pour over the popcorn and stir a few times.

Chocolate on popcorn

Add in the Nerds candy after those first few stirs. Now you really want to stir things up, so that the popcorn is thoroughly coated.

chocolate popcorn with Nerds

If you’re using dark chocolate, you won’t be able to see the Nerds in there very well. That’s okay – you’ll still taste them, and that’s all you need.

Spread the chocolate popcorn out on a baking sheet that has been covered in parchment paper. The better you spread it out, the easier it will be to break into chunks later. Refrigerate until the chocolate has solidified, perhaps 15-30 minutes.
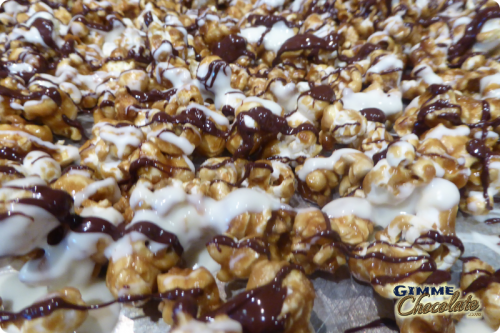
chocolate popcorn cooling

Break up the clumps and put into a container. I used an old gallon pickle jar I had around the house. They’re pretty useful sometimes, so I keep a few.

The chocolate covered popcorn with Nerds was a big hit with the kids. We adults liked it too.

Chocolate popcorn with Nerds

3.2 from 2083 votes
Chocolate popcorn with Nerds
Chocolate Covered Popcorn With Nerds
Ingredients
  • 5 cups popped popcorn
  • 8 oz dark chocolate chips or chopped into small pieces
  • 2 oz Nerds candy
Instructions
  1. Place popcorn in large bowl with plenty of room for mixing. Cover a baking sheet with parchment paper.

  2. Place chocolate in small bowl and melt in 30 second increments until completely melted. Stir between rounds.

  3. Pour melted chocolate over popcorn and give a quick stir to lightly coat popcorn.

  4. Add in Nerds and keep stirring popcorn until thoroughly coated.

  5. Spread chocolate popcorn on covered baking sheet as well as possible. Refrigerate 15-30 minutes, or until chocolate has solidified.

  6. Break up large chunks of popcorn and place in storage container or serving bowl. Enjoy.

Recipe Notes

You can be very approximate with measurements in this recipe. It's very flexible.

Disclosure: Gimme Chocolate is a participant in the Amazon Services LLC Associates Program, an affiliate advertising program designed to provide a means for sites to earn advertising fees by advertising and linking to amazon.com. I also review or mention products for which I may receive compensation from other sources. All opinions are my own.

Subscribe to my feed Twitter Pinterest Instagram