

How much do you love Cadbury Creme Eggs? They’re super popular around here. We get a few before Easter, but the rest get bought on Half Price Candy Day. Well, more like 30% off at some stores, but you do what you have to do.
But rather than wait for Cadbury Creme Eggs to come out each year, how about making your own version? Homemade creme eggs are pretty easy to make. They aren’t exactly like the Cadbury version, but they’re pretty good.
These are easiest done in candy molds, although you can hand shape and dip them if that’s the way you roll. I like using molds for the pretty designs.
Because I made these for Easter, I made these in egg shaped candy molds. They aren’t totally 3D, but that’s because I didn’t want to deal with trying to put the two sides together. I certainly could have filled two sides and used a little chocolate to make it more egg-shaped all the way around if I wanted.
Keeping the halves apart has another advantage – portion control! They’re a nice size for eating without getting too large this way.
Easter is such a hazardous time if you’re trying to behave about candy. These creme eggs and my chocolate dipped Peeps aren’t the only things I’ve made for the holiday, just the only ones I’ve posted about in the past few days. I also made my pomegranate truffles and crunchy raspberry chocolate chunks. We usually skip the chocolate bunnies you can get from the store because there’s so much homemade stuff.
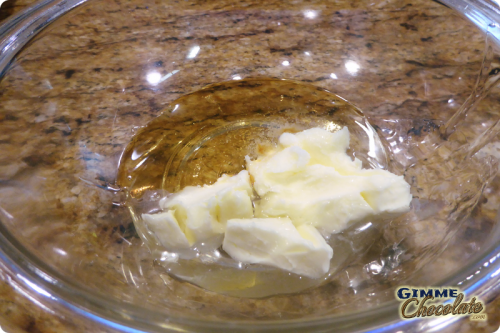
Combine light corn syrup, room temperature butter, salt, and vanilla using your mixer. This part is super easy. Beat until smooth.
Adding the powdered sugar takes some extra effort. You don’t want a cloud of powdered sugar going everywhere. Add it a bit at a time, and start the mixing by hand. You can use the mixer more as the powdered sugar gets mixed in, but that stuff gets everywhere if you aren’t careful. And sometimes even if you are.

My oldest daughter was shocked by how much powdered sugar this recipe takes. The look on her face was pretty classic. Kids don’t always realize how much this stuff shrinks into the rest of the ingredients.
By the time all of the powdered sugar is in there, the mix is getting stiff. My poor little handheld mixer really struggled with it at the end. You may want to do all of this mixing by hand. This may have to do with my house being pretty cold the day I made these. Room temperature for the butter was maybe a little on the cool side still.
Take about a third of the mix and add yellow food coloring if you’re sticking to the egg look. It only takes 2-3 drops.

If your mix is a little runny, you can refrigerate the mix before trying to form it. This isn’t necessary if you’re using mold – the more flexible the mix is, the easier it is to put into molds.
Melt your chocolate (I chose semi-sweet this time, but milk chocolate is closer to the originals). Milk chocolate may need a little coconut oil so that it flows better into the molds. I didn’t use that for my semi-sweet chocolate, however.
Fill the molds and let the chocolate sit for 1-2 minutes. This will give a thicker shell than pouring it out right away. After pouring out the chocolate, refrigerate the molds for a few minutes to partially harden the chocolate.

If the filling is stiff enough, you can fill the eggs and put the chocolate over the backs right away. I found it a little difficult to get the yellow parts to stay kind of round, as half eggs don’t have a lot of depth. Try to get the filling in as neatly as possible, so that there aren’t too many holes. This is easier if the filling isn’t totally solid. Keep the filling just below the top of the mold so that there is room for the chocolate.

Drop the molds short distances to the countertop after putting the chocolate on the backs to smooth the chocolate out. This gives a nice, fairly smooth look.
Refrigerate for about a half hour to set the chocolate. If the chocolate is firm enough, it should come out of the molds easily. If it’s not ready, refrigerate for longer.
I had a slight problem with some of the excess chocolate on the backs of the eggs. I broke it off, and accidentally exposed some of the insides of the egg. If that happens, there are two things you can do.
1. Eat the egg.
2. Dab a little chocolate over the exposed filling and chill the egg for a little while.
I mostly did the second option, but there’s always the sacrificial/sample candy option in there. You’re doing all this work; you get to have a little fun too. Now that you know how to make homemade creme eggs, you don’t have to wait for the stores to get them.


- 1/2 cup light corn syrup
- 1/4 cup butter room temperature
- 1/4 tsp salt
- 1-2 tsp vanilla extract
- 3 cups powdered sugar
- 3 drops yellow food coloring optional
- 12 oz milk chocolate
- 1 tsp coconut oil
-
Combine light corn syrup, room temperature butter, salt, and vanilla using your mixer. Beat until smooth.
-
Add powdered sugar slowly, maybe a half cup at a time. Mix by hand to avoid a mess. As the powdered sugar combines with the other ingredients, you can start using your mixer again. Mix until smooth.
-
Optional: Take about a third of the mixture and place into another bowl. Mix in yellow food coloring until desired color is achieved.
-
Melt chocolate and coconut oil in 30 second increments in microwave. Stir between rounds. Chocolate will become smooth after a few rounds.
-
Spoon chocolate into candy molds. Tap to get the bubbles out. Allow to sit for 1-2 minutes to make a slightly thicker shell. Pour out excess chocolate.
-
Refrigerate molds for a few minutes to slightly firm up the chocolates.
-
Add in filling. Start with the white part, then put a ball of yellow "yolk" in the middle. Cover with more white.
-
Refrigerate if necessary to firm up the filling. If filling is already firm or after refrigeration, cover the backs of the molds with chocolate. Refrigerate for at least 30 minutes to solidify the chocolate in the mold.
-
Remove chocolates from molds when they come out of the molds easily. If the chocolate sticks too much, place back in the refrigerator and cool longer. You may want to place these back in the refrigerator after removing from molds to ensure that chocolate solidifies completely.
-
Serve when you can't keep the ravening hordes away any longer.